 |
| Calligraphy with home-made walnut ink |
Walnut ink is a liquid derived from the husk of walnuts, with staining
properties. It has been used by visual artists
as a drawing and lettering medium. Walnut ink is made from natural pigment that
develops when the husk- the external fleshy envelope of the walnut starts rotting,
turning from lime green when it is attached to the tree to dark brown after it
has fallen off. Calligraphers like it as a lettering medium; its sepia tone
creates softer effects than black ink and can be used for washes. I was puzzled to
hear that sometimes what can be referred to as walnut ink may actually be peat-based.
I have been curious to learn how ‘real
walnut ink’ can be made, true to its name. And maybe, I could make my
own; I noticed the availability of walnuts
with their husk at the Ottawa Farmer’s
market during the month of August.
 |
| Fresh walnuts with their husks at varying degree of decomposition |
With the
help of Youtube videos I found out that the process of pigment extraction can
be fairly simple. In a nutshell (pun intended!), one can soak a given weight of black husks in a given volume of water (initially
very hot) and let it sit for 2-4 days. After
straining, you have walnut ink. Another
method consists of boiling the entire
walnuts with their husk for a while, and let the liquid reduce until the desired
tint is obtained. I tried both and got very similar results.
 |
| Walnuts with black husks |
 |
| Black husks peeled from walnuts |
I purchased
a mix of green and blackened husked walnuts and let them all become
black on a window sill for several days (Do not leave it too long piled up as cute
little green worms start wiggling in the husk flesh…). Then I peeled the husk from enough walnuts to yield about 1
ounce of it. I placed it in a stocking
and tied it with an elastic band, dropped it in a glass jar and covered
it with about ½ cup of steaming hot water (I used rainwater, but some suggest
using distilled water). I let it sit for
4 days.
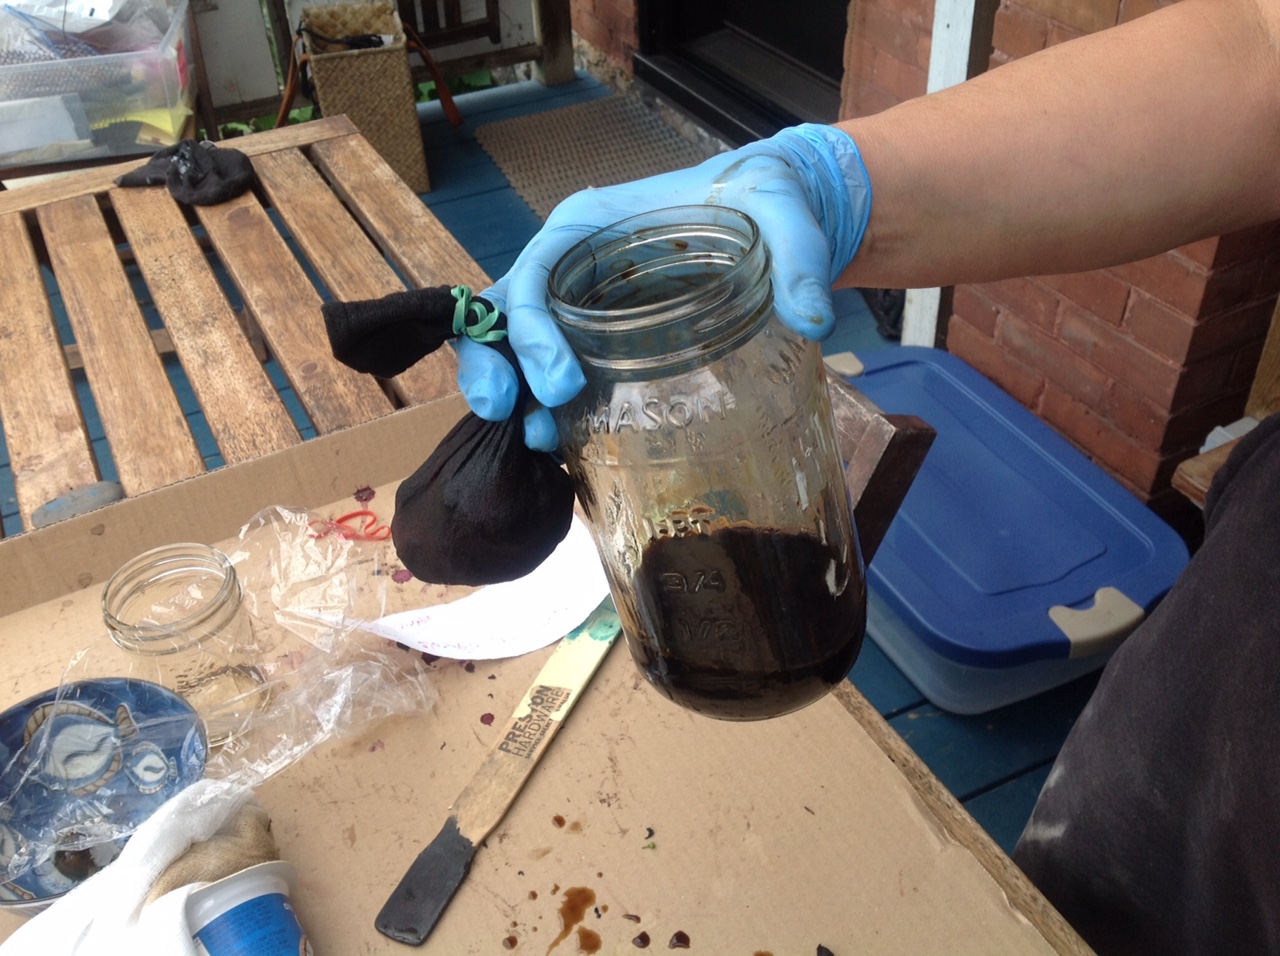
I then took out the pouch of
husks and squeezed it in the jar to extract the concentrated pigment. I strained the liquid again through
a cheese cloth and voilà- my own walnut ink! This is messy so wear protective wear (gloves, etc and protect your working surfaces against staining.
Some suggest adding a drop of bleach to prevent mould growth. I tried it on a small quantity of ink,
thinking it might weaken the pigment, but it did not seem to. Other suggested adding a bit of gum arabic to improve smoothness of the fluid.
 |
| Pulling out the pouch of husks |
 |
| Ahhh.. squeezing out the 'sepia gold' |
 |
| Et voilà! |
 |
| Another method: boiling the whole nuts and reducing the liquid |
I also used
the other method of boiling the entire walnuts until the reduction reaches the tint desired. That is more work, as one needs
to use dedicated coockery for that, and supervision while it is on the cooktop. I did
not see a difference in the resulting walnut inks.
It is a
special feeling to do calligraphy with your own walnut ink! If you do not have access to walnut husks,
calligraphy equipment supplier like John Neal in the US sells a kit that
includes the husks in a pouch, instructions, and a link to a Youtube video.
No comments:
Post a Comment